
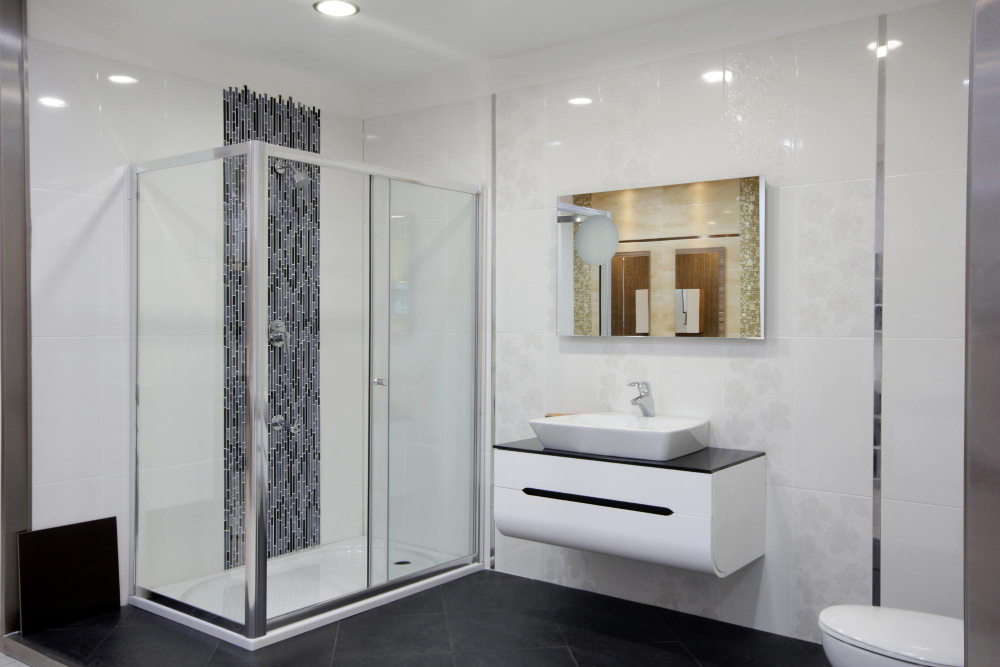
A successful walk-in shower remodeling project should create more than a beautiful place to bathe. It should make the bathroom safer, easier to clean, more comfortable to use, and better prepared for the homeowner’s future needs. The finishes may create the first impression, but the decisions hidden beneath the tile—waterproofing, drainage, framing, plumbing, and ventilation—determine whether the shower remains elegant or becomes an expensive repair.
True luxury is not defined by imported stone or an oversized rain head. It is defined by a shower that feels effortless every morning and performs reliably for decades.
“Spend first on waterproofing, drainage, and plumbing valves. Decorative upgrades can be changed later; hidden construction failures cannot.”
Begin With the Right Size and Layout
A walk-in shower should be sized around comfort, entry clearance, fixture placement, and water containment. A compact shower may fit into a smaller bathroom, but a narrow enclosure can feel restrictive and may allow water to escape through an open entry.
A shower measuring approximately 36 by 36 inches may function as a practical minimum in some layouts. A width of 42 to 48 inches usually offers more comfortable movement, while a 60-inch enclosure can accommodate a bench, multiple fixtures, or aging-in-place features more gracefully. Exact requirements depend on local codes, the bathroom layout, and accessibility goals.
Before finalizing the design, homeowners should consider:
- Whether the shower will be fully enclosed or have an open entrance.
- How far the spray will travel from the showerhead.
- Whether a bench, handheld sprayer, or grab bars are needed.
- Where the controls can be reached before entering the water stream.
- Whether the entrance will remain comfortable as mobility changes.
A curbless entry creates a seamless visual transition and can improve accessibility, but it requires careful floor planning. The bathroom framing may need to be recessed or modified so the shower floor can slope toward the drain without creating an awkward elevation change.
Design note: Reinforcing the walls for future grab bars is inexpensive while the framing is open. It is far more difficult after tile installation.
Waterproofing Is the Most Important Finish You Never See
Tile and grout are not the primary waterproofing system. Water can pass through grout joints and reach the material beneath the surface. The actual protection comes from a properly installed shower pan, waterproof membrane, sealed corners, treated fastener penetrations, and correctly integrated drain assembly.
A dependable system should create a continuous waterproof envelope across the floor and walls. The shower floor must also slope consistently toward the drain so water does not remain in low spots. Before tile is installed, the contractor should test the shower assembly according to applicable requirements and manufacturer instructions.
Homeowners should ask the contractor:
- Which waterproofing system will be used?
- How will seams, niches, benches, and plumbing penetrations be sealed?
- Will the shower pan be tested before tile installation?
- How will the waterproofing connect to the drain?
- Who is responsible if the system fails?
A premium tile installed over poor waterproofing is still a poor shower.
Choose the Drain Before Choosing the Tile Pattern
The drain affects framing, plumbing, floor slope, and tile layout. A traditional center or offset point drain requires the floor to slope from several directions. This generally works well with smaller mosaic tiles because they conform more easily to the changing plane.
A linear drain allows the shower floor to slope primarily in one direction. This can support larger floor tiles and create a cleaner architectural appearance. However, the drain must be properly sized, positioned, and coordinated with the waterproofing system.
Neither option is automatically superior. A point drain is often practical and cost-effective. A linear drain may be worth the additional investment when the design calls for large-format flooring, a curbless entrance, or a highly streamlined visual effect.
Select Tile for Safety and Maintenance
Large-format porcelain tile is popular on shower walls because it creates fewer grout joints and a quieter, more expansive appearance. Porcelain also offers strong moisture resistance and generally requires less maintenance than many natural stones.
The shower floor requires a different priority: traction. Highly polished surfaces may look elegant but can become slippery when wet. Smaller mosaic tile creates more grout lines, which may improve grip, while textured porcelain can provide a more secure walking surface.
Natural stone introduces distinctive color and movement, yet it may require sealing and specialized cleaning. Homeowners who want a stone-like appearance with easier upkeep may prefer porcelain designed to resemble marble, limestone, or concrete.
When comparing materials, evaluate:
- Slip resistance on the shower floor.
- Required sealing and cleaning products.
- Grout-joint quantity and maintenance.
- Compatibility with the planned drain and floor slope.
- Availability of replacement pieces.
Understand the Glass Options
Frameless glass produces the most open and refined appearance because it minimizes visible metal channels. It typically uses thicker glass and requires accurate measurements after the tile is complete. Semi-frameless systems retain some framing while offering a lighter appearance than traditional fully framed enclosures.
Fully framed enclosures are often more economical and can provide reliable water containment, although they create more edges and tracks to clean. Low-iron glass reduces the green tint visible in standard clear glass, which may be noticeable beside white or pale tile. Protective glass coatings can reduce mineral buildup, but they do not eliminate routine cleaning.
For an open shower, carefully study spray direction and room temperature. A large opening may feel visually luxurious, yet it can allow more water and warm air to escape. In smaller bathrooms, a hinged door or fixed panel with a return may offer better comfort and containment.
Invest in Plumbing That Supports Daily Comfort
Fixtures should be selected before the walls are closed because valves and rough-in components are installed inside the wall. A thermostatic valve can help maintain a more consistent water temperature, while a separate volume control may provide better adjustment than a basic single-control valve.
A handheld shower is one of the most practical additions. It simplifies cleaning, assists children and pets, and supports future mobility needs. It can be paired with a standard wall-mounted showerhead or a rain-style fixture.
Multiple outlets may require larger supply lines, adequate water pressure, and sufficient hot-water capacity. A dramatic shower system offers little value if the home cannot support its flow requirements.
“A dependable valve used twice a day is a better investment than a decorative showerhead chosen only for appearance.”
Plan Storage, Lighting, and Ventilation Early
Shower niches should be sized around the products the household actually uses. A narrow decorative niche may look attractive while failing to hold taller bottles. Shelves should have a slight slope so water drains away from the wall.
A built-in bench can improve comfort and accessibility, but it must be framed, waterproofed, and sloped correctly. Floating benches may create a lighter appearance, while full-height masonry or framed benches provide more visual weight and surface area.
Lighting should be rated for the intended wet or damp location. Soft recessed lighting can make the shower feel brighter without creating glare. Every enclosed bathroom also needs effective ventilation to remove moisture after use. An appropriately sized exhaust fan, ideally with convenient controls or humidity sensing, helps protect paint, cabinetry, grout, and indoor air quality.
Budget, Timeline, and Hidden Costs
Walk-in shower costs vary widely based on demolition, plumbing relocation, structural modifications, tile selection, glass, waterproofing, and regional labor rates. A straightforward replacement using standard materials may remain relatively controlled, while a curbless shower with custom glass, multiple fixtures, and premium finishes can become a substantial investment.
Potential costs that homeowners often overlook include:
- Repairing hidden water or framing damage.
- Moving the drain or supply lines.
- Upgrading ventilation or electrical circuits.
- Custom glass fabrication.
- Subfloor modification for a curbless entry.
- Wall reinforcement for grab bars or benches.
- Permit and inspection fees where required.
A typical project may require several weeks when demolition, inspections, waterproofing, tile work, curing time, and glass fabrication are included. Custom glass is usually measured after the finished tile surfaces are complete, so the enclosure may arrive later than the main construction work.
Common Mistakes That Reduce Long-Term Value
- Selecting glossy floor tile without considering traction.
- Ordering fixtures before confirming plumbing compatibility.
- Building a niche that is too small for everyday products.
- Skipping wall reinforcement for future accessibility features.
- Installing tile before testing the waterproofing system.
- Creating an open entrance without studying spray direction.
- Spending heavily on finishes while using entry-level valves.
- Failing to plan for adequate ventilation.
Professional walk-in shower renovation planning helps coordinate these hidden technical decisions before they become expensive construction changes.
How to Protect the Finished Shower
After completion, routine maintenance preserves both appearance and performance. Use a squeegee on glass and tile to reduce mineral deposits, keep the exhaust fan running after showers, and clean grout with products compatible with the selected materials. Avoid harsh cleaners on natural stone or specialty finishes.
Inspect sealant joints periodically, particularly where walls meet the floor, glass connects to tile, or fixtures penetrate the surface. Damaged sealant should be addressed before moisture reaches vulnerable areas.
The best walk-in shower remodeling projects balance visual refinement with disciplined construction. Homeowners should prioritize layout, waterproofing, drainage, valves, ventilation, and safe materials before selecting decorative details. When those fundamentals are handled correctly, the shower can deliver the quiet luxury people value most: comfort, reliability, easy maintenance, and confidence every day.